19.Stable Diffusion:最热门的开源AI画图工具
大部分内容来自于极客时间徐文浩-AI大模型之美
前面体验了CLIP这个多模态的模型。在这个模型里,已经能够把一段文本和对应的图片关联起来了。看到文本和图片的关联,想必你也能联想到过去半年非常火热的“文生图”(Text-To-Image)的应用浪潮了。相比于在大语言模型里OpenAI的一枝独秀。文生图领域就属于百花齐放了,OpenAI陆续发表了DALL-E和 DALL-E 2 ,Google也不甘示弱地发表了 Imagen ,而市场上实际被用得最多、反馈最好的用户端产品是 Midjourney 。
不过,在整个技术社区里,最流行的产品则是Stable Diffusion。因为它是一个完全开源的产品,我们不仅可以调用Stable Diffusion内置的模型来生成图片,还能够下载社区里其他人训练好的模型来生成图片。我们不仅可以通过文本来生成图片,还能通过图片来生成图片,通过文本来编辑图片。
那么今天这一篇文章,我们就来看看如何使用Stable Diffusion,做到上面这些事情。
使用Stable Diffusion生成图片 文生图 可能你还没怎么体验过文生图的应用,那我们先用几行最简单的代码体验一下。在这一讲里,我建议一定要用Colab或者其他的GPU环境,因为用CPU来执行的话,速度会慢到让人无法接受。
安装依赖包:
1
2
%pip install diffusers accelerate transformers
代码:
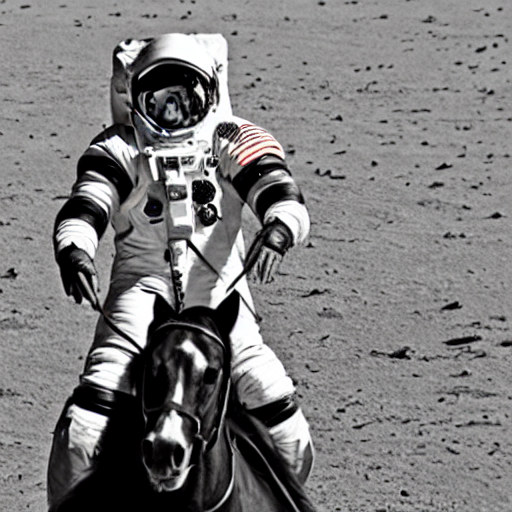
1
2
3
4
5
6
from diffusers import DiffusionPipeline"runwayml/stable-diffusion-v1-5" )"cuda" )"a photograph of an astronaut riding a horse" ).images[0 ]
输出结果:
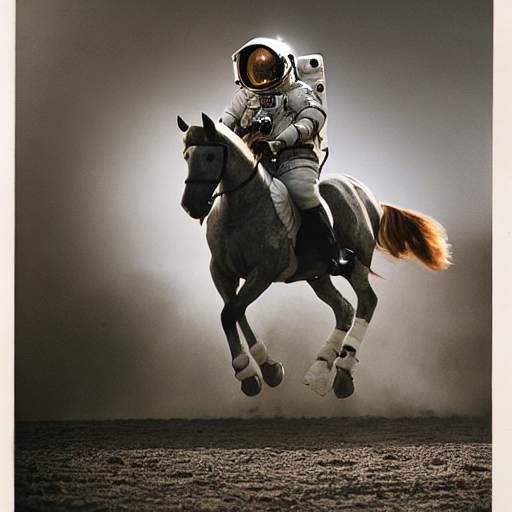
代码非常简单,只有寥寥几行。这里,我们使用了Huggingface的Diffusers库,通过DiffusionPipeline加载了RunwayML的stable-diffusion-v1-5的模型。然后,指定了这个Pipeline使用CUDA也就是利用GPU来进行计算。最后向这个Pipeline输入了一段文本,通过这段文本我们就生成了一张图片。
这里,我们画的是在Stable Diffusion里非常经典的一张“宇航员在太空骑马”的图片。之所以画这么一张图片,是为了证明我们并不是通过“搜索”的方式找到一张已经存在的图片。比如,上一讲里我们介绍过CLIP模型,其实就可以完成从文本到图片的搜索功能。而Stable Diffusion,是真的让AI“画”出来一张新的图片。毕竟,以前宇航员也从来没有在太空骑过马,也不可能有人拍下过这样的照片。
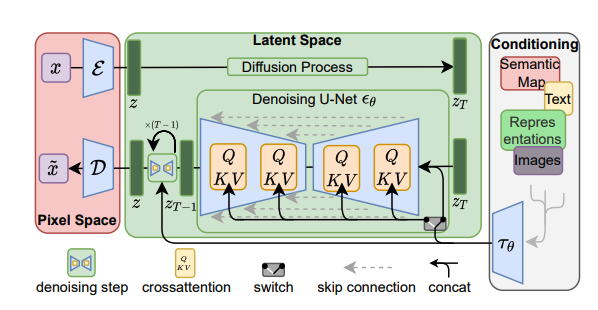
Stable Diffusion的基本原理 Stable Diffusion生成的图片效果的确不错,相信你也很好奇这个事情的原理是什么。其实,Stable Diffusion背后不是单独的一个模型,而是由多个模型组合而成的。整个Stable Diffusion文生图的过程是由这样三个核心模块组成的。
第一个模块是一个Text-Encoder,把我们输入的文本变成一个向量。实际使用的就是前面介绍的CLIP模型。因为CLIP模型学习的是文本和图像之间的关系,所以得到的这个向量既理解了文本的含义,又能和图片的信息关联起来。
第二个是Generation模块,顾名思义是一个图片信息生成模块。这里也有一个机器学习模型,叫做UNet,还有一个调度器(Scheduler),用来一步步地去除噪声。这个模块的工作流程是先往前面的用CLIP模型推理出来的向量里添加很多噪声,再通过UNet+Scheduler逐渐去除噪声,最后拿到了一个新的张量。这个张量可以认为是一个尺寸上缩小了的图片信息向量,里面隐含了我们要生成的图片信息。
最后一个模块,则是Decoder或者叫做解码器。背后也是一个机器学习的模型,叫做VAE。它会根据第二步的返回结果把这个图像信息还原成最终的图片。
这个过程,你可以结合Stable Diffusion相关论文里的一张模型架构图来看。
这样听起来可能有点太理论了,那我们还是看看具体的代码和图片生成的过程吧,这样就比较容易理解图片是怎么生成的了。
我们先把DiffusionPipeline打印出来,看看它内部是由哪些部分组成的。
输出结果:
1 2 3 4 5 6 7 8 9 10 11 12 13 14 15 16 17 18 19 20 21 22 23 24 25 26 27 28 29 30 31 32 33 34 StableDiffusionPipeline {"_class_name" : "StableDiffusionPipeline" ,"_diffusers_version" : "0.15.1" ,"feature_extractor" : ["transformers" ,"CLIPFeatureExtractor" "requires_safety_checker" : true,"safety_checker" : ["stable_diffusion" ,"StableDiffusionSafetyChecker" "scheduler" : ["diffusers" ,"PNDMScheduler" "text_encoder" : ["transformers" ,"CLIPTextModel" "tokenizer" : ["transformers" ,"CLIPTokenizer" "unet" : ["diffusers" ,"UNet2DConditionModel" "vae" : ["diffusers" ,"AutoencoderKL"
这个对象里面有3部分。
Tokenizer和Text_Encoder,就是我们上面说的把文本变成向量的Text Encoder。可以看到我们这里用的模型就是上一讲的CLIP模型。
UNet和Scheduler,就是对文本向量以及输入的噪声进行噪声去除的组件,也就是Generation模块。这里用的是UNet2DConditionModel模型,还把PNDMScheduler用作了去除噪声的调度器。
VAE,也就是解码器(Decoder),这里用的是AutoencoderKL,它会根据上面生成的图片信息最后还原出一张高分辨率的图片。
剩下的feature_extractor,可以用来提取图像特征,如果我们不想文生图,想要图生图,它就会被用来把我们输入的图片的特征提取成为向量。而safety_checker则是用来检查生成内容,避免生成具有冒犯性的图片。
接下来,我们就自己来组合一下这些模型,来把整个图片生成的过程给演示出来。首先,我们把上面Stable Diffusion 1.5需要的模型组件都加载出来。
1
2
3
4
5
6
7
8
9
10
11
12
13
14
from transformers import CLIPTextModel, CLIPTokenizerfrom diffusers import AutoencoderKL, UNet2DConditionModel, PNDMScheduler"runwayml/stable-diffusion-v1-5" , subfolder="vae" )"openai/clip-vit-large-patch14" )"openai/clip-vit-large-patch14" )"runwayml/stable-diffusion-v1-5" , subfolder="unet" )"runwayml/stable-diffusion-v1-5" , subfolder="scheduler" )"cuda"
注意,对应的CLIPTokenizer和CLIPTextModel的名字并不是stable-diffusion-v1-5,如果使用Diffusers库的Pipeline的话,可以从模型里面对应模块的 config.json 读取到它们。
然后,我们把接下来生成图片的参数初始化一下,包括文本、对应的图片分辨率,以及一系列模型中需要使用的超参数。
1
2
3
4
5
6
7
8
9
10
import torch"a photograph of an astronaut riding a horse" ]512 512 25 7.5 42 ) len (prompt)
然后,我们把对应的输入文本变成一个向量,然后再根据一个空字符串生成一个“无条件”的向量,最后把两个向量拼接在一起。我们实际生成图片的过程,就是逐渐从这个无条件的向量向输入文本表示的向量靠拢的过程。
1
2
3
4
5
6
7
8
9
10
11
12
13
text_input = tokenizer("max_length" , max_length=tokenizer.model_max_length, truncation=True , return_tensors="pt" with torch.no_grad():0 ]1 ]"" ] * batch_size, padding="max_length" , max_length=max_length, return_tensors="pt" )0 ]
然后,我们可以先生成一系列随机噪声。
1
2
3
4
5
6
7
8
latents = torch.randn(8 , width // 8 ),
接下来就是生成图片的代码了,我们先定义两个函数,它们会分别显示Generation模块生成出来的图片信息,以及Decoder模块还原出来的最终图片。
1
2
3
4
5
6
7
8
9
10
11
12
13
14
15
16
17
18
19
20
21
22
23
24
25
26
27
28
29
import PILimport torchimport numpy as npfrom PIL import Imagefrom IPython.display import displaydef display_denoised_sample (sample, i ):0 , 2 , 3 , 1 )1.0 ) * 127.5 0 ])f"Denoised Sample @ Step {i} " )return image_pildef display_decoded_image (latents, i ):1 / 0.18215 * latentswith torch.no_grad():2 + 0.5 ).clamp(0 , 1 )0 , 2 , 3 , 1 ).numpy()255 ).round ().astype("uint8" )for image in images]f"Decoded Image @ step {i} " )0 ])return pil_images[0 ]
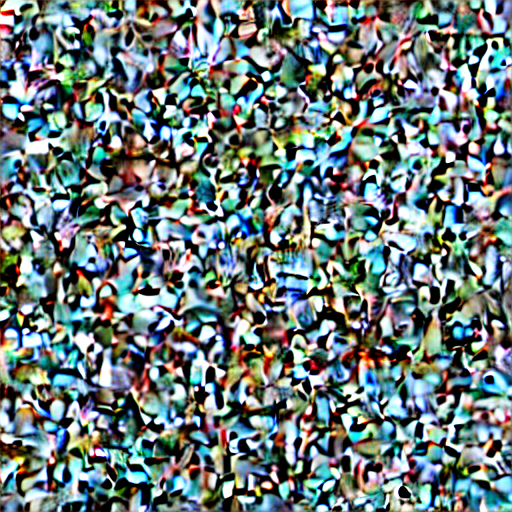
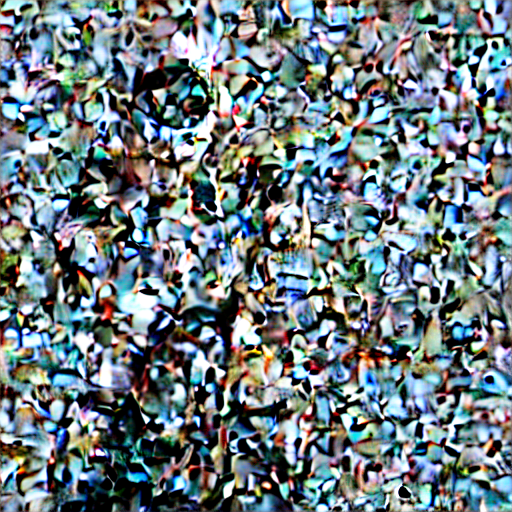
最后,我们通过Diffusion算法一步一步来生成图片就好了。我们根据前面指定的参数,循环了25步,每一步都通过Scheduler和UNet来进行图片去噪声的操作。并且每5步都把对应去噪后的图片信息,以及解码后还原的图片显示出来。
1
2
3
4
5
6
7
8
9
10
11
12
13
14
15
16
17
18
19
20
21
22
23
24
25
26
27
28
from tqdm.auto import tqdmfor i, t in enumerate (tqdm(scheduler.timesteps)):2 )with torch.no_grad():2 )if i % 5 == 0 :
输出结果:
1
2
Denoised Sample @ Step 0
1 2 Denoised Sample @ Step 5
1
2
Denoised Sample @ Step 10
1
2
Decoded Image @ step 10
…..省略step15-20
1
2
Denoised Sample @ Step 25
1
2
Decoded Image @ step 25
运行完程序,你就可以看到我们的图片是如何一步步从完全的噪点还原成一张图片的了。而且你仔细观察,还可以看到Generation生成的图像信息,类似于Decoder还原出来的图像信息的轮廓。这是因为U-Net其实是一个图片语义分割的模型。
而如果我们打印一下生成的图片的维度,你也可以看到,Generation生成的图像信息分辨率只有64x64,而我们还原出来的图片分辨率是512x512。
1 2 3 4 5 6 print(latents.shape)
输出结果:
1 2 3 torch.Size([1, 4, 64, 64])
图生图 相信你已经理解了这个Stable Diffusion生成图片的过程,以及过程里每个模块的工作了。那你应该比较容易理解如何通过Stable Diffusion实现图生图了,我们下面就来具体看一看。
当然,这一次我们就不用自己一步步调用各个模块来实现图生图了。我们可以直接使用Diffusers库里自带的Pipeline。
1 2 3 4 5 6 7 8 9 10 11 12 13 14 15 16 17 18 19 20 21 22 23 import torch
输出结果:
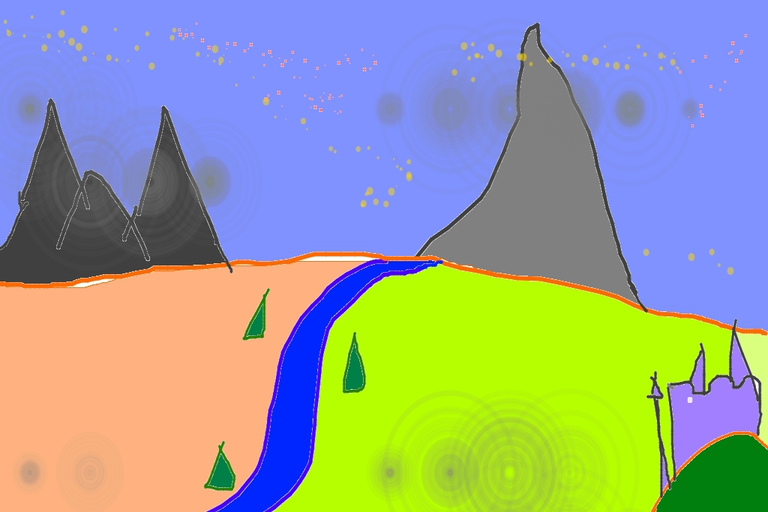
对应的代码也非常简单,我们把Pipeline换成了StableDiffusionImg2ImgPipeline,此外除了输入一段文本之外,我们还提供了一张草稿图。然后,你可以看到对应生成的图片的轮廓,就类似于我们提供的草稿图。而图片的内容风格,则是按照我们文本提示语的内容生成的。
StableDiffusionImg2ImgPipeline的生成过程,其实和我们之前拆解的一步步生成图片的过程是相同的。 唯一的一个区别是,我们其实不是从一个完全随机的噪声开始的,而是把对应的草稿图,通过VAE的编码器,变成图像生成信息,又在上面加了随机的噪声。 所以,去除噪音的过程中,对应的草稿图的轮廓就会逐步出现了。而在一步步生成图片的过程中,内容又会向我们给出的提示语的内容来学习。
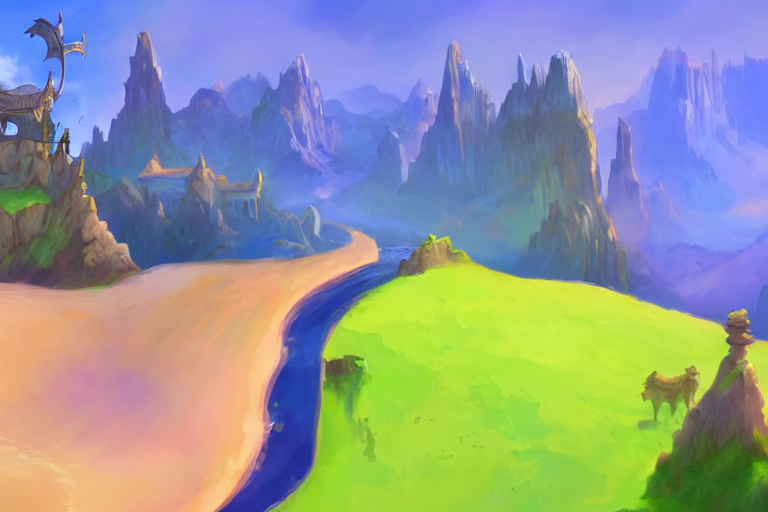
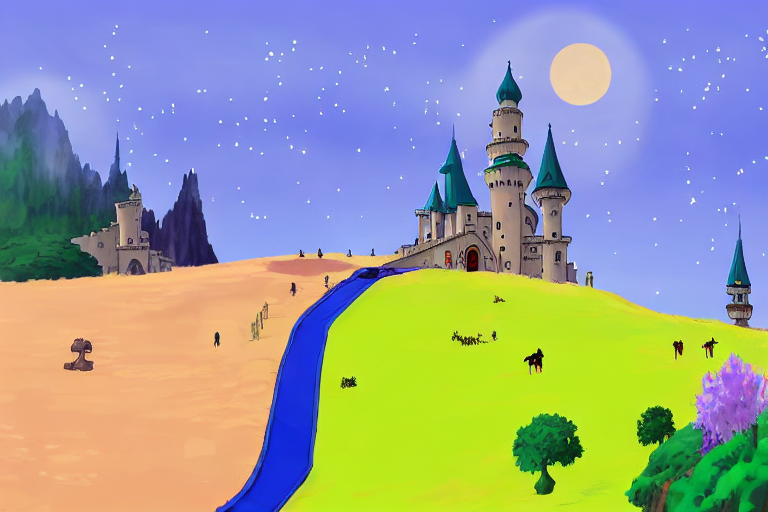
而如果我们换一下提示语,就能更改生成的具体内容。比如我们想换成宫崎骏的风格,并且希望后面高耸的不是山,而是城堡,出现的图片还是相同的轮廓,但是用不同的内容。我在下面给出了一个代码示例,你可以自己看一看。
1 2 3 4 5 6 prompt = "ghibli style, a fantasy landscape with castles"
输出结果:
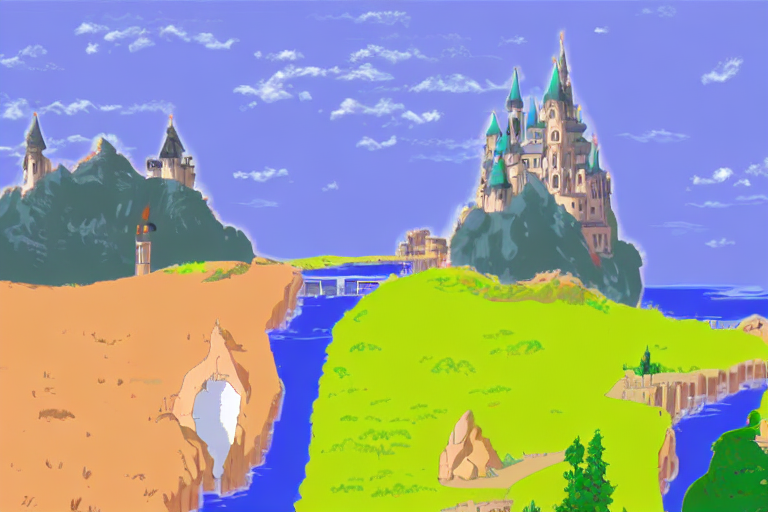
更多使用方法 理解了Stable Diffusion的基本框架,你可以试一试更多相关的Pipeline的用法。比如,除了引导内容生成的提示语,我们还可以设置一个负面的提示语(negative prompt),也就是排除一些内容。
1 2 3 4 5 6 prompt = "ghibli style, a fantasy landscape with castles"
输出结果:
可以看到,我们希望在图片里面尽量排除“River”。而新生成的图片,右边就没有了任何类似于河流的内容,而中间蓝色的部分也更像一个排水渠而不是自然的河流。负面提示语并不会改变模型的结构。它其实就是把原先的“无条件”向量,替换成了负面提示语的向量。这样,模型就尽可能从负面的提示语文本内容中向我们正面的提示语文本内容学习,也就是尽量远离负面提示语的内容。
同样,我们还可以通过Stable Diffusion来提升图片的分辨率,只不过需要一个单独的模型。这个模型就是专门在一个高低分辨率的图片组合上训练出来的。对应的UNet和VAE的模型是和原始的Stable Diffusion不一样的。
1 2 3 4 5 6 7 8 9 10 11 12 13 14 15 16 17 18 19 20 21 22 23 from diffusers import StableDiffusionUpscalePipeline
输出结果:
如果我们打印一下pipeline,对应的模型的组件还是相同的。
输出结果:
1 2 3 4 5 6 7 8 9 10 11 12 13 14 15 16 17 18 19 20 21 22 23 24 25 26 27 28 29 30 StableDiffusionUpscalePipeline {
但是如果你去看对应模型的配置文件,可以看到 VAE 和 UNet 里使用的模型都是不一样的。
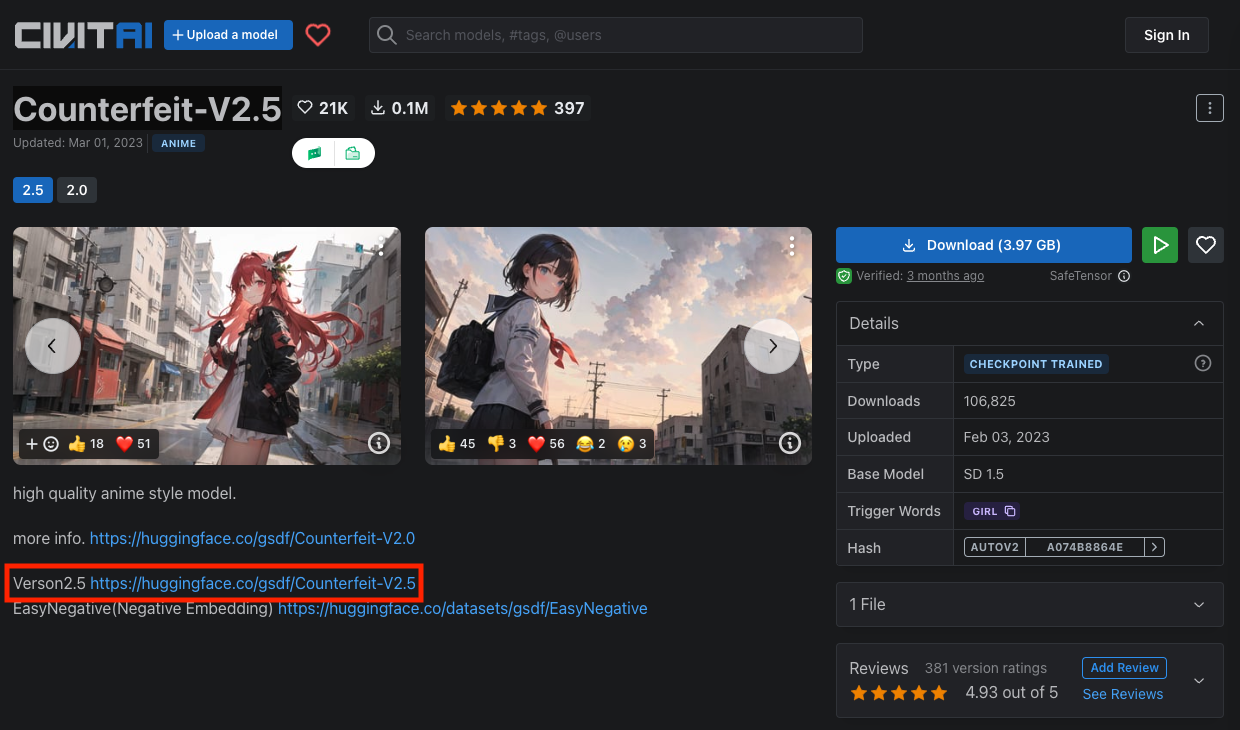
使用社区里的其他模型 在这个过程中,你可以看到Stable Diffusion并不是指某一个特定的模型,而是指一类模型结构。因为Stable Diffusion是完全开源的,所以你大可以利用自己的数据去训练一个属于自己的模型。事实上,市面上开源训练出来的Stable Diffusion的模型非常多,也已经有了像 CIVITAI 这样的分享Stable Diffusion模型的平台。
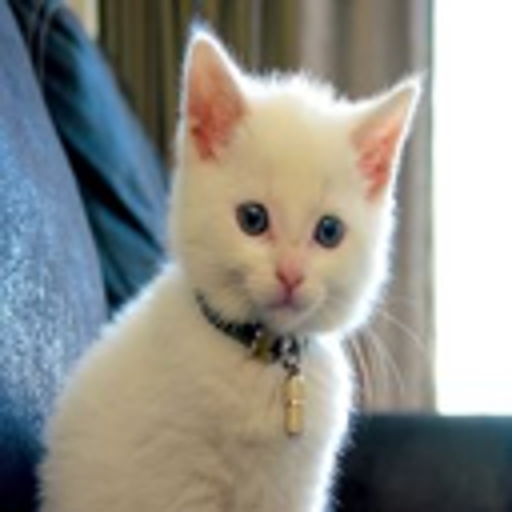
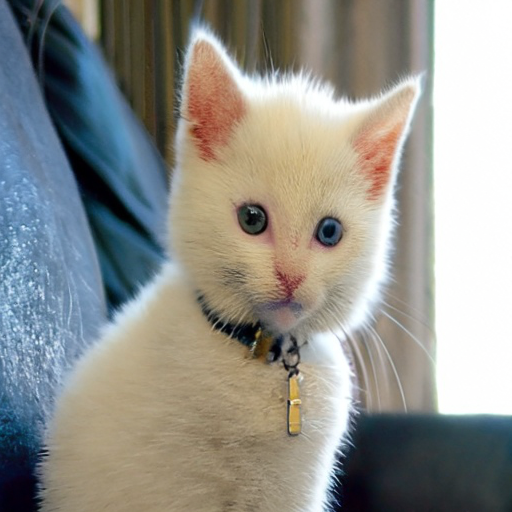
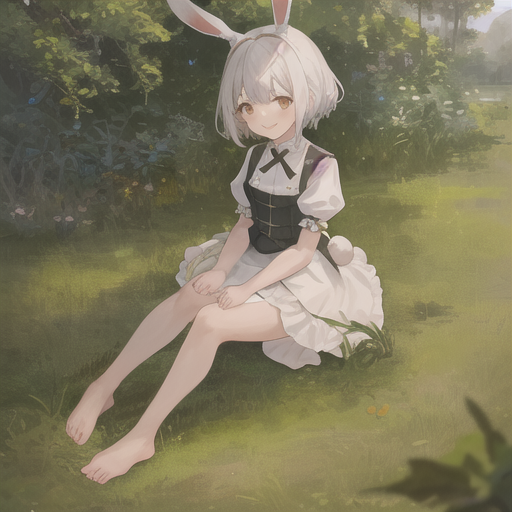
我们可以去CIVITAI的网站,找到我们喜欢的模型。比如我们专门找一个二次元的模型 counterfeit-V2.5 。在对应的模型页面,我们可以看到它直接就包含了Huggingface里面的模型。
所以我们就可以直接通过Diffuers库来调用这个模型。
1 2 3 4 5 6 7 pipeline.to("cuda")
输出结果:
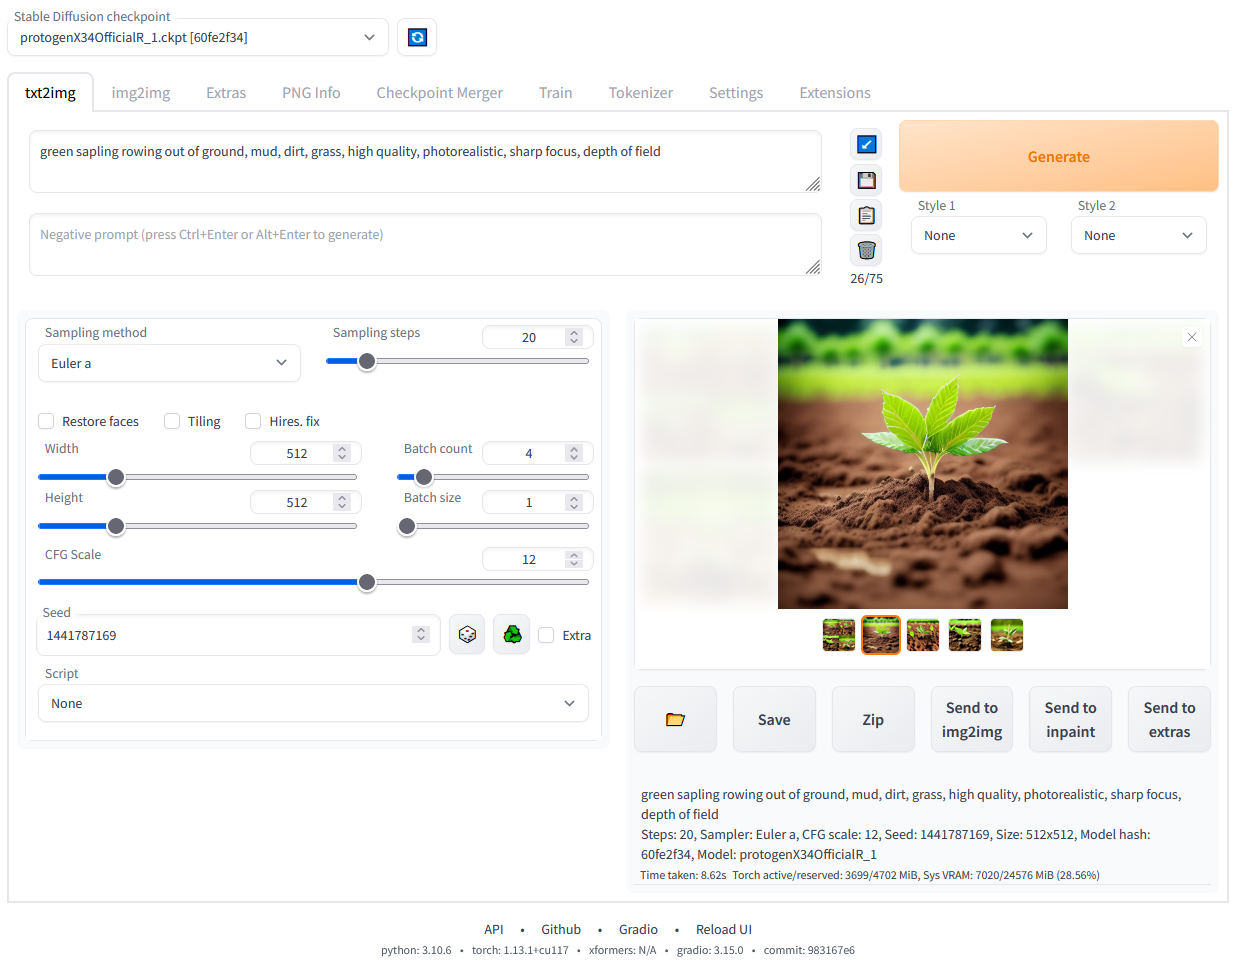
当然,不是所有CIVITAI里的模型都在Huggingface上提供了自己的模型版本。默认CIVITAI的模型,往往只是提供了一个模型权重文件。你可以使用现在最流行的 Stable-Diffusion-Web-UI 应用 来使用这个模型权重文件。你可以把Web-UI在本地部署起来,它会提供一个图形界面让你不用写代码就可以直接调整各种参数来生成图片。
CIVITAI 的 Wiki 里面也详细提供了在Stable-Diffusion-Web-UI里面使用模型的步骤,你可以照着这个步骤多拿几个模型试试看。
小结 这一讲,体验了Stable Diffusion这个图片生成的开源模型。不仅通过Diffusers这个封装好的Python库,体验了文生图、图生图、提升图片分辨率等一系列应用,也深入到Stable Diffusion的模型内部,理解了整个模型的结构,还看到我们是如何一步步从一张全是噪点的图片,逐渐去除噪声变成一张可用的图片的。
推荐阅读 这一讲里,只是简单介绍了一下Stable Diffusion的模型结构。其实,无论是DALL-E 2还是Imagen,采用的图片生成方式都是和Stable Diffusion类似的。如果你想要深入了解一下这些模型的结构,可以去看一下B站里面“跟李沐学AI”里面对于 DALL-E 2 论文的讲解 。


\images\654414\fd262baafbb52271b0d906d00a167c06.png)